Microsoft excel 2016 enable macros, microsoft enable macros excel, excel 2019 macro enable, how to enable microsoft excel, microsoft excel 2019 step by step, enabling macros in excel 2019, microsoft excel 2019, microsoft excel 2019 certification exam, microsoft excel 2019 product key free, microsoft excel 2010,
Welcome to a comprehensive guide on how to enable macros in Microsoft Excel step by step! This is an essential skill for any Excel user who wants to automate repetitive tasks and boost their productivity. We have gathered some valuable information to help you through the process of enabling macros with ease. So, without further ado, let's dive right into it!
What are Macros?
To begin with, let us first understand what macros are. Macros are a series of instructions or commands that you can record and use repeatedly to automate tasks in Microsoft Excel. Macro is short for "Macintosh Macro". They are a powerful tool that can save you a lot of time by automating mundane, repeated tasks. Enabling macros is a simple process, and we will show you how to do that below.
Step-by-Step Guide: Enabling Macros in Microsoft Excel
Now that we understand what macros are, let's take a look at the step-by-step process of enabling macros in Excel.
Step 1: Open the Microsoft Excel Application
First, open the Microsoft Excel application on your computer. Make sure that you have more than one worksheet open as multiple worksheets are necessary for creating macro buttons. Once you have done that, go on to step 2.
Step 2: Click the File tab
Next, click the File tab located on the top left corner of the Excel window. A drop-down menu will appear.
Step 3: Click "Options"
On the drop-down menu, click "Options" located at the bottom left corner of the window. A new window will appear.
Step 4: Click "Trust Center"
In the new window that opens, click on "Trust Center" located in the left pane. Then, click on the "Trust Center Settings" button by the right side of the window.
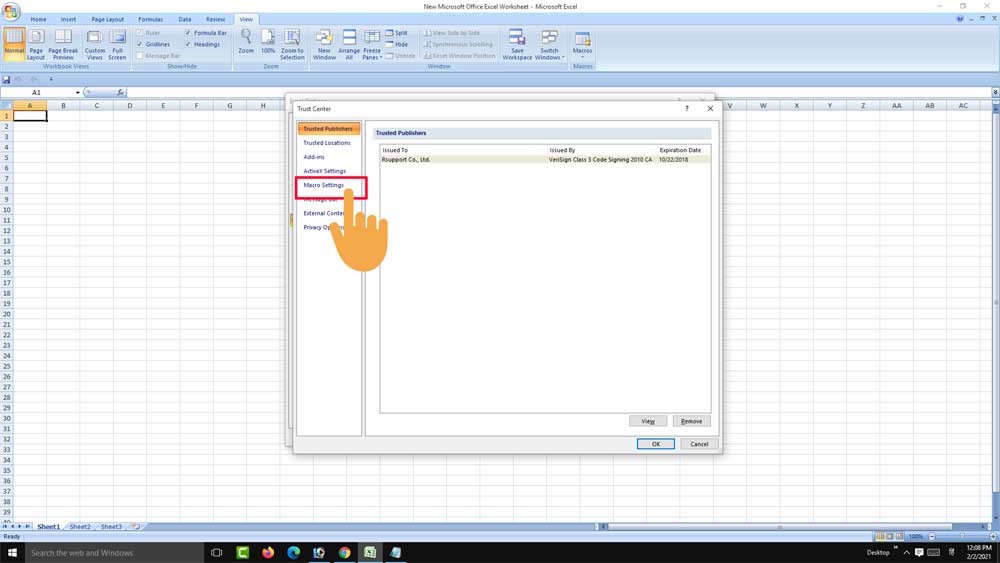
Step 5: Enable Macros
Once the "Trust Center Settings" dialog box opens, click on "Macro Settings" on the left pane. Then, click on the "Enable all macros" radio button located in the "Macro Settings" section. If you prefer, you can enable only "Signed macros" or "Disable all macros except digitally signed macros". Once you make your choice, click on "OK" to save your settings.
Step 6: Save Changes
Lastly, click on the "OK" button on the "Trust Center" dialog box to save your changes. Once you have done that, you are good to go! You have successfully enabled macros on Microsoft Excel!
Conclusion
Enabling macros in Excel can be a lifesaver for anyone who works with large spreadsheets. With macros, you can automate repetitive tasks and increase productivity. All it takes is a few simple steps, as outlined above, and you will be on your way to macro heaven in no time!
We hope that you have found this guide useful. If you have any questions or comments, feel free to leave them below. Happy macro-ing!


